This took a while to figure out, mainly because I’m a unix guy trying to “figure out” Windows Server and it’s archaic ACL system and the fact that ACL’s/attributes under OSX are just insane. The main issue I had with all the other recipes on the net describing this process was that it did NOT work for OSX/Finder. When users transferred the files, Finder was not able to strip off it’s “in-use” attribute from the file once copied to the destination. This would leave files in limbo (greyed out) and no one could touch/access them from another Mac until I stripped the “in-use” attribute off manually. Normally SMB capable NAS’s ignore Finder/OSX attributes and this does not happen, but FS7500 is “mac friendly” and preserves the attributes so we had to figure out a way to give Finder enough rights to be able to strip the attribute off once the file was copied.
The core idea here is that you have a windows share (\\elm\DROPBOX in my case) which has a bunch of subfolders under it, one per class (they are in the form of BDCxxx.yyy in my case). What we’re trying to do is give AD users who are in AD groups (also called BDCxxx.yyy in my case) which represent classes enough permission to get inside \\elm\dropbox and see the name of the subfolders and be able to drag files onto the appropriate class subfolder (BDCxxx.yyy), essentially submitting their assignment. What we don’t want to let the users do is to peak inside those subfolders. It’s the equivalent of a “write only” group permission on a folder (no execute or read bit) in unix land. We also want to have our instructors be able to access everything in the DROPBOX share, so we use a group called DropBoxMasters for that purpose.
For the sake of this example I will use the student/class group BDC974.011 which the students belong to and DropBoxMasters group for our instructors. So here we go:
1) We obviously need a share. If you’re using a FS7500 NAS you just create the share and that’s it, no sharing permissions, everything is controlled by Windows ACL’s. If your share is on windows then I guess you can give full control sharing permissions to Domain Users. Once this is done we access \\elm to set the Windows permissions on DROPBOX share.
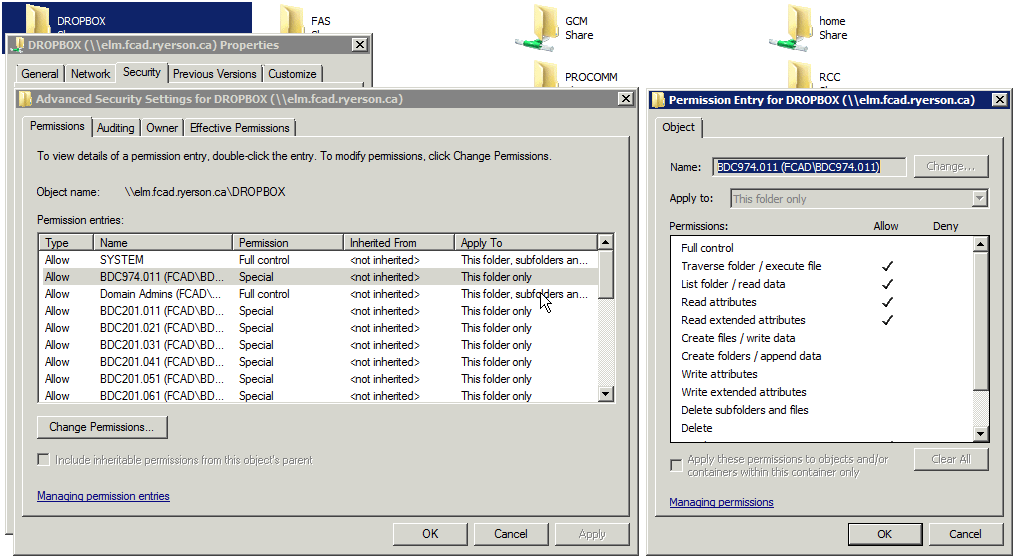
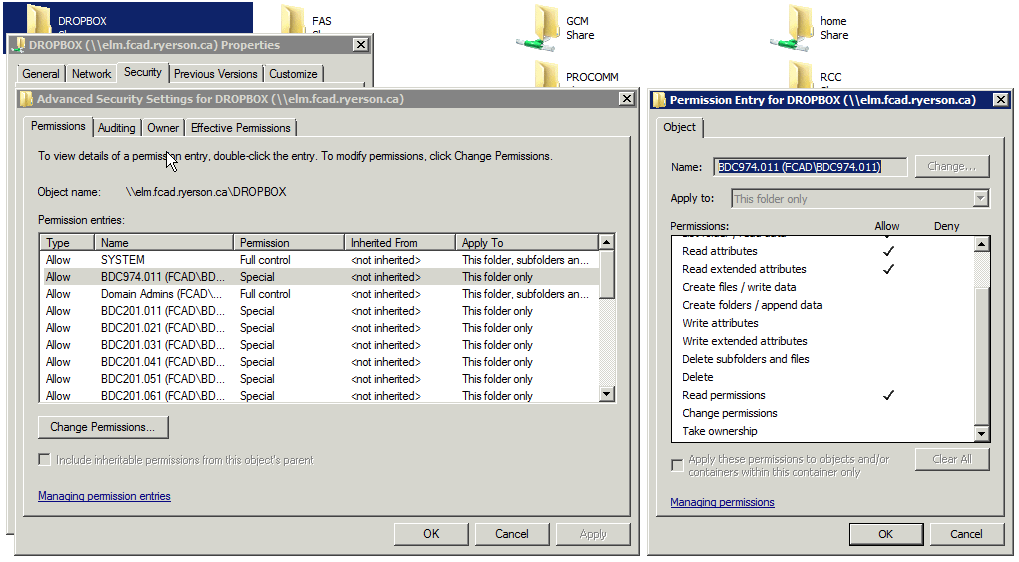
2) For DROPBOX we need the following permissions to be set to Allow and Apply it to “This folder only”: Traverse folder/execute file, List folder/read data, Read attributes, Read extended attributes, Read permissions. This will allow our BDC974.011 students to see the content of this folder (i.e. the subfolders, one per course). Remember that you need to create this permission set for each individual course/group/class. And remember to apply to “This folder only”.
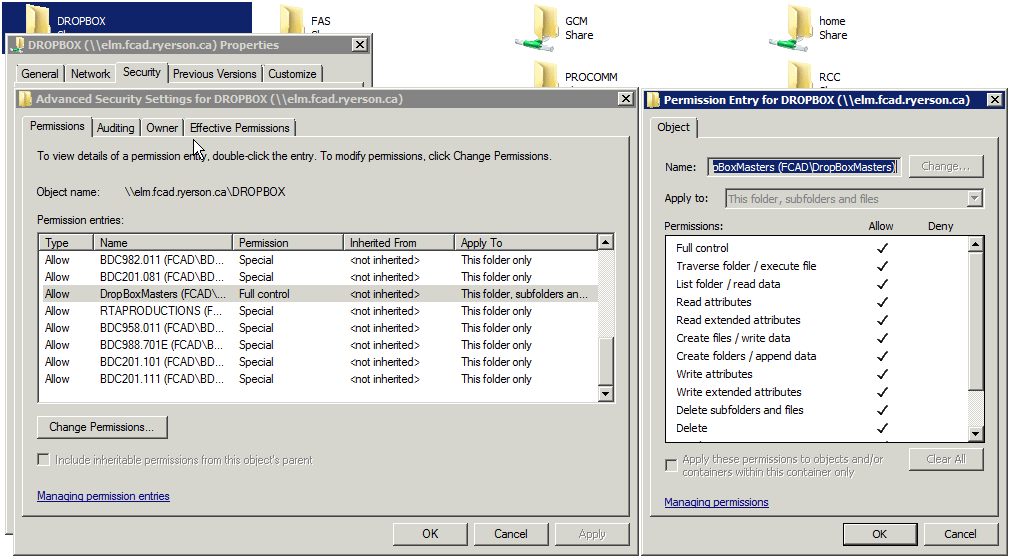
3) Still on DROPBOX share permissions we want to setup the DropBoxMasters group. This one is easy since it’s “Full control” permission that applies to “This folder, subfolder and files”. Easy :-)
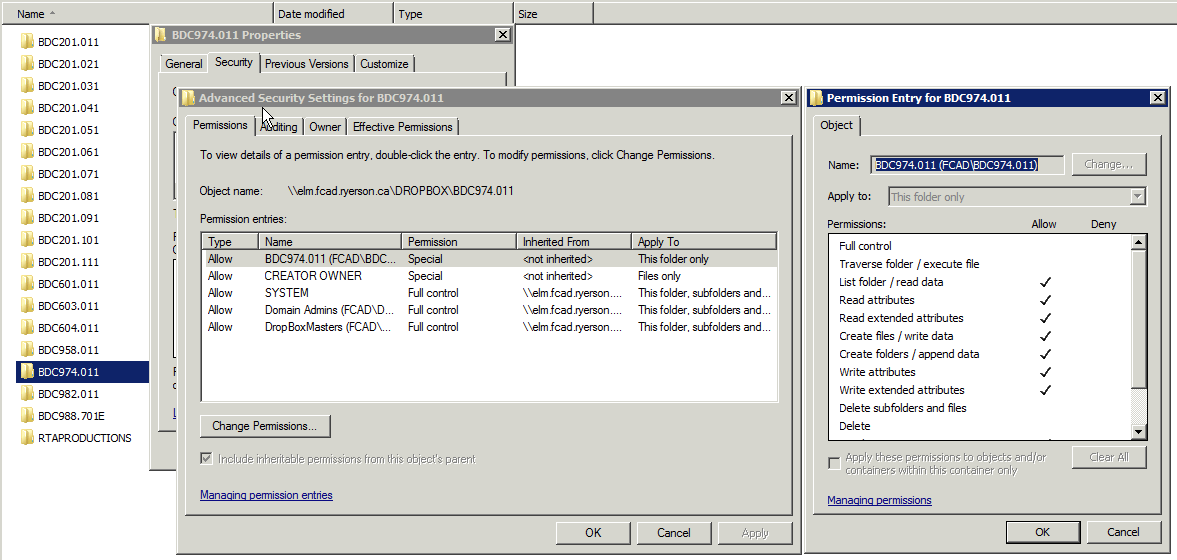
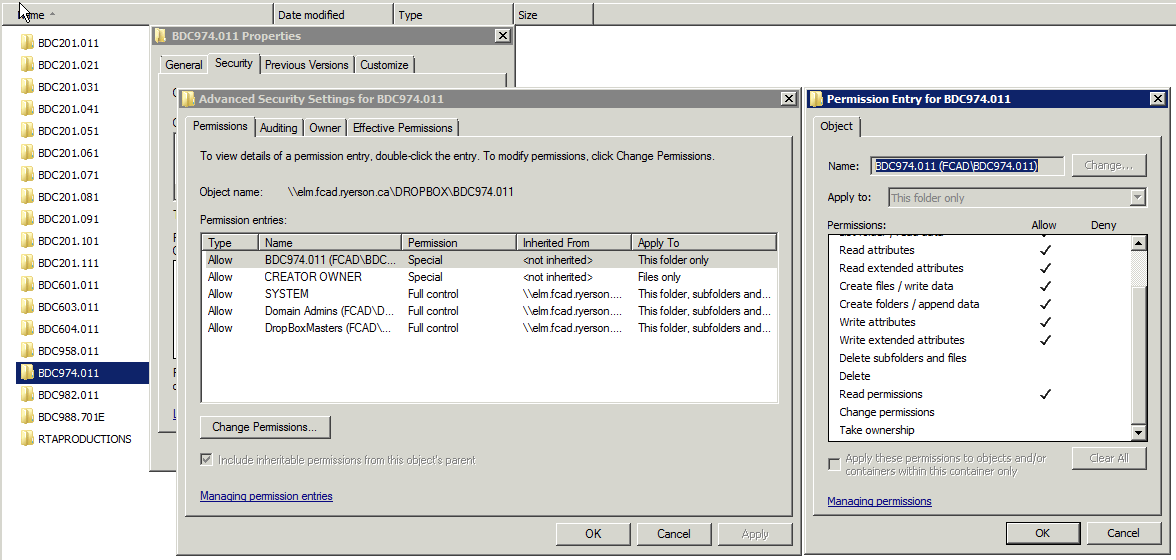
4) Before we go on, a note about the above process. In the permissions/Advanced security settings you should only have the “class/course” groups, the DropBoxMasters group, SYSTEM group (with full control) and Domain Admins (with full control). Next we want to create the subfolders inside DROPBOX, one subfolder per course/class (BDC974.011 in my case). Permission wise we want to setup the following permissions for the group that matches our course/folder (i.e. the example screen shots here are for group BDC974.011 on subfolder \\elm\DROPBOX\BDC974.011). We need the following permissions to be set to Allow and Apply it to “This folder only”: List folder/read data, Read attributes, Read extended attributes, Create files/write data, Create folders/append data, Write attributes, Write extended attributes, Read permissions.
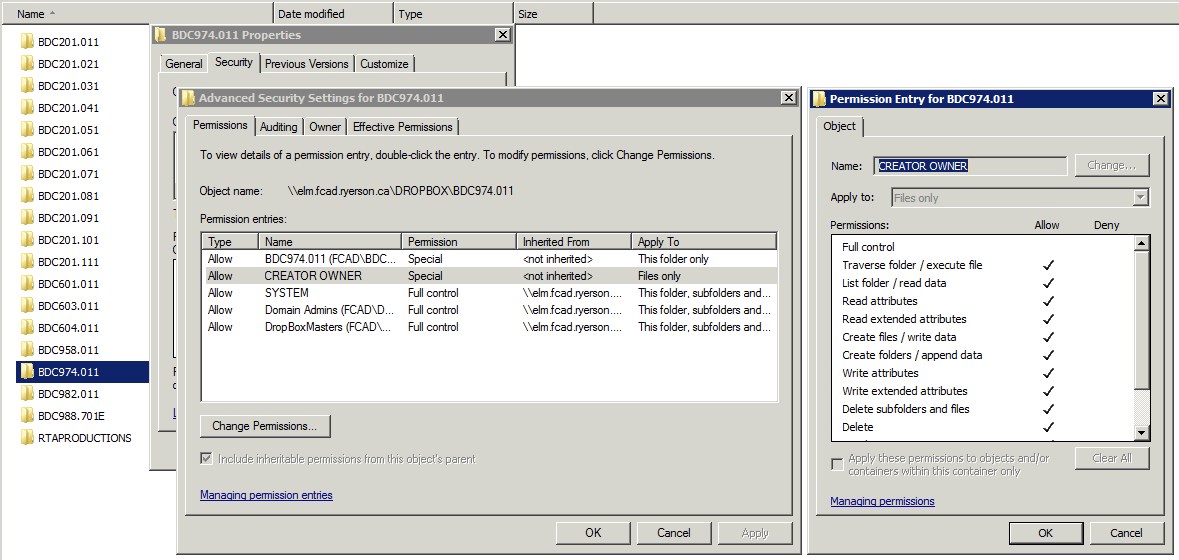
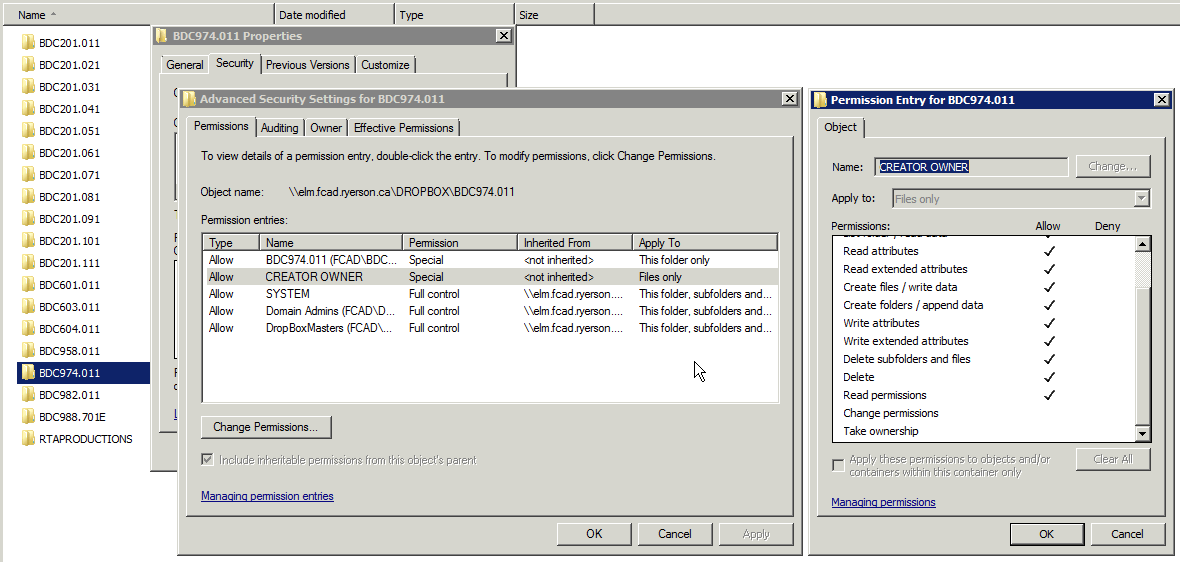
5) Still in the security settings for the course subfolder we need to add “CREATOR OWNER” to the list of permissions (This is a built-in windows entity) and give it the following permissions for “Files only”: basically all the allow check boxes EXCEPT the following (leave unchecked)……Full control, Change permissions, Take ownership. Remember these permissions are to be applied to “Files only”.
That’s it…..Now just keep repeating this for all your courses/groups.
