Let me first state that this has been tried in my environment and it works. It might NOT work for you. Try it first and make sure your backups are clean and good. I have a OSX server (10.5.5 as of this writing) that needed to be backed up and am using a QNAP TS-409 PRO as my backup location. The QNAS has a AFP/SMB share called “Backup” where I keep all my backups. The server is configured with 2x80GB drives in raid-1 mode (mirror). Here is how I did it (again your milage may vary):
1) First we need to find out the MAC address of your server. I’m using one of the two ethernet ports on the server (en0) so I just open up a terminal window and type ifconfig en0 to get the MAC address. You’ll see something like this:saturn:~ mayromlo$ ifconfig en0
en0: flags=8863
inet your.ip.address.here netmask 0xffffff00 broadcast your.network.broadcast.here
ether 00:19:e3:e8:2f:02
media: autoselect (100baseTX
supported media: autoselect 10baseT/UTP
saturn:~ mayromlo$
The line we’re interested in is the one starting with ether (line 5). Take down that number without the colons (ie: 0019e3e82f02 in my case).
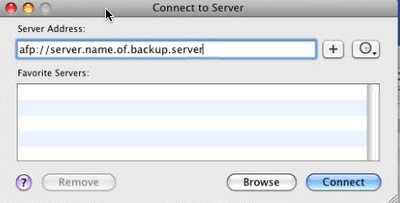
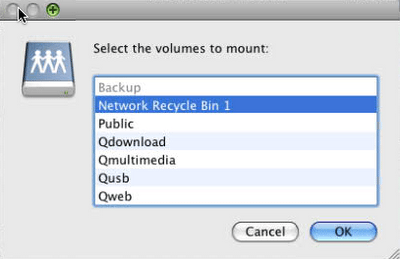
2) Mount the AFP share on to your server. Mine is called Backup.
3) In a terminal window change your current directory to the AFP share (eg: Backup) and create a empty file called .MACaddressnumber, where MACaddressnumber is the number we jotted down under 1). saturn:~ mayromlo$ cd /Volumes/BackupThis hidden file is needed for every machine you want to Time Machine into your NAS. I’m backing up also workstations so I’ve got a couple of these hidden files.
saturn:Backup mayromlo$ touch .0019e3e82f02
4) Next we need to create a reasonably sized Sparsebundle file. This is where the actual backup gets done. The Sparsebundle doesn’t take a lot of space initially and grows as more files need to be backed up. For example I created a 80GB Sparsebundle file that was only 8MB large in reality, but grew to 20GB when I did the first backup. We need to create the Sparsebundle file on the local OSX machine (eg: OSX server in my case). Again this is important, Create the sparsebundle on a local OSX machine NOT the network share. So open up a terminal and type the following to create the initial file: hdiutil create -size 80g -ov -fs HFS+J -type SPARSEBUNDLE -volname "Backup of Saturn" Saturn_0019e3e82f02.sparsebundleSo in the above example we have
- -size 80g which specifies 80GB for our sparsebundle size
- -ov to overwrite if the file exists
- -fs HFS+J for format of our bundle which is Journaled HFS+
- -type SPARSEBUNDLE which is self explanatory
- -volname should be set to “Backup of hostname” whatever your hostname is
- and last is the actual sparsebundle filename which consists of Hostname_MACaddress.sparsebundle
5) On the server issue the following command to enable Time Machine for Networked drives:defaults write com.apple.systempreferences TMShowUnsupportedNetworkVolumes 1
6) On the server in Finder goto Preferences and make sure “Connected Servers” is checked under “Show these items on the Desktop“.
7) Open up the Time Machine Preference panel and select the AFP share as your disk. Enjoy and please remember YOU ARE RESPONSIBLE FOR BACKUP INTEGRITY, SO CHECK YOUR BACKUPS TO MAKE SURE THEY ARE GOOD.


3 responses to “OSX: Time Machine backup to NAS”
Great description, thanks. Am trying it out right now on a ReadyNAS NV+, with a sparse file of 1300 Gb. Now if that works…
Sweet!
works great with my linkstation live!
UVB,
Great, glad to hear you got it working…..